Uploading a Blueprint
Get the latest docs
You are looking at documentation for an older release. Not what you want? Go to the current release documentation.For the Manager to be able to deploy your blueprint, you need to upload it to the manager. You can upload a blueprint using the CLI or the Web UI.
If you haven’t already written a blueprint, you can either write one now or you can download an example blueprint for you to upload.
Uploading via the CLI
The Cloudify command-line features two ways of uploading your blueprint to the manager:
publish-archiveallows you to upload a pre-packaged archive such as *.tar, *.tar.gz, *.tar.bz, *.zip.uploadallows you to specify a path to a Blueprint file, and the Cloudify will take care of compressing the folder and its contents for you.
Here is an example of publish_archive:
$ cfy blueprints publish-archive -l ARCHIVE_LOCATION -b BLUEPRINT_ID -n BLUEPRINT_FILENAME
...

...
Here is an example of upload:
$ cfy blueprints upload -b BLUEPRINT_ID -p BLUEPRINT_FILE_LOCATION
...

...
Uploading via the Web UI
You can also upload a pre-packaged Blueprint archive, such as *.tar, *.tar.gz, *.tar.bz, *.zip., in the Cloudify Manager UI.
The upload blueprint button can be found in the “Blueprints” section in the UI:
Clicking on it will cause the blueprint upload dialog to appear.
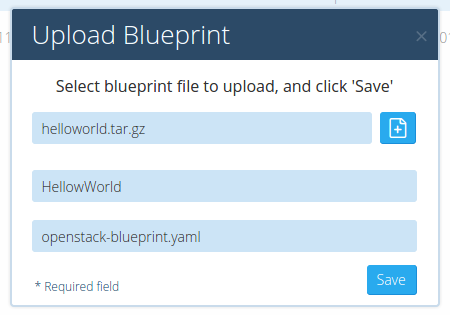
The user can either type in the path to the blueprint archive, or select it from the filesystem by pressing the + button:
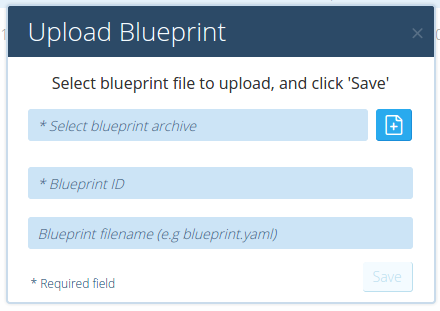
The Blueprint ID field is required.
The Blueprint filename field is optional and refers to the *.yaml file that contains the application topology. If left blank, the default blueprint.yaml file will be used. To override, The user should fill out the name of the YAML file to be used.
Once all the required fields are filled, the Save button becomes available.
Clicking the Save button will cause the dialog box to be grayed out until the blueprint file is fully uploaded to Cloudify. After the upload is done, the user will be redirected to the blueprint’s page.
Upload the blueprint
Let’s use the CLI to upload the Nodecellar blueprint.
If you have downloaded the cloudify-nodecellar-example from github and you would like to use the particular blueprint for your IaaS, you can run one of the these:
cfy blueprints upload -b nodecellar -p openstack-blueprint.yaml
cfy blueprints upload -b nodecellar -p softlayer-blueprint.yaml
cfy blueprints upload -b nodecellar -p aws-ec2-blueprint.yaml
cfy blueprints upload -b nodecellar -p vcloud-blueprint.yaml
The -b flag assigns a unique name to this blueprint on the Cloudify manager. Before creating a deployment though, let’s see what this blueprint looks like.
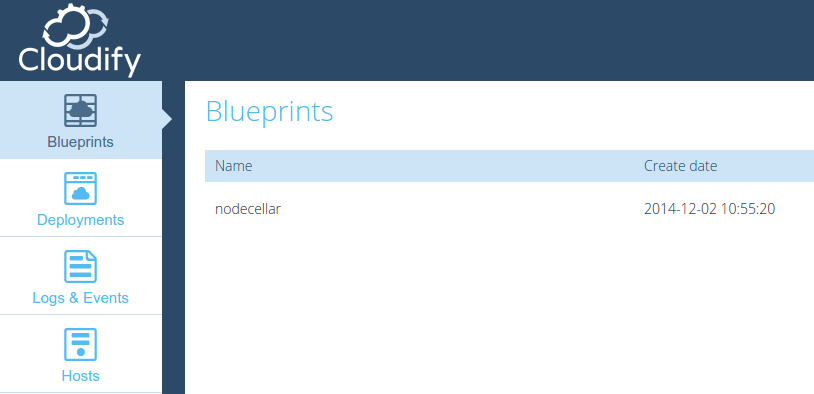
Point your browser at the manager’s URL again and refresh the screen, you will see the nodecellar blueprint listed there.
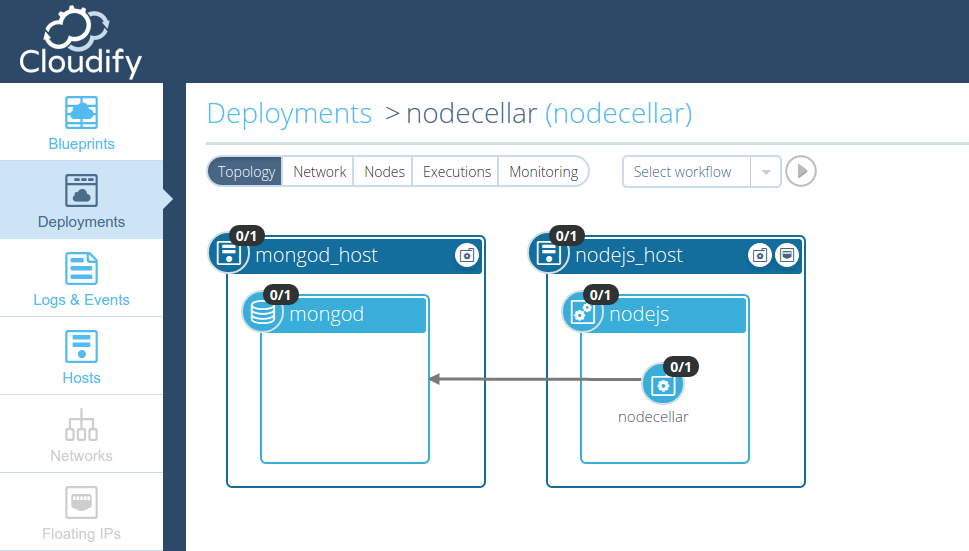
Click the blueprint, and you can see its topology.
A topology consists of elements called nodes.
In our case, we have the following nodes:
- Two VM’s (one for mongo and one for nodejs)
- A nodejs server
- A MongoDB database
- A nodejs application called nodecellar (which is a nice sample nodejs application backed by mongodb).
What’s Next
You should now have a Blueprint ready for you to deploy.